
Panoramic Photography
Posted by Leigh Diprose and Scott Dordick on 2nd Oct 2018
When traversing the environment locally or internationally sometimes a wide-angle lens isn’t wide enough to tell the full story. To truly capture the splendor of the scene sometimes you need help with specialized equipment. In the case of capturing magnificent expansive landscapes, a panoramic tripod head and some software are the perfect combinations for the task.
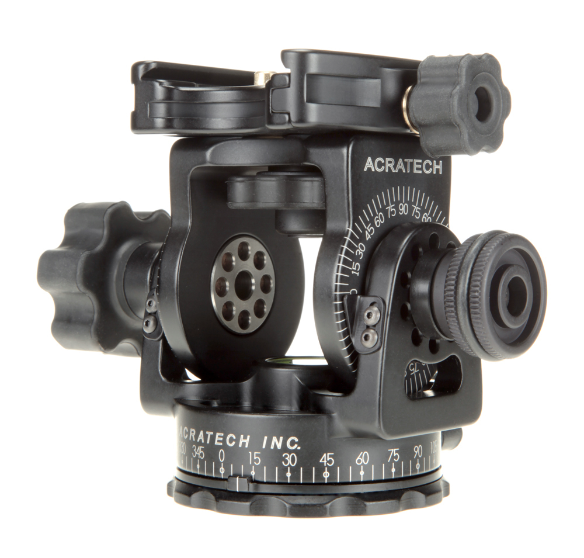
Using an Acratech Panoramic Head attached between your camera and tripod legs, you suddenly can photograph the scene by taking multiple photos in a row. This multi-row approach excels with your camera in a vertical orientation an Acratech Lbracket is perfect for this. The reason for turning the camera vertically instead of horizontally is to ensure more of the scene ends up in the frame.
Panoramic heads, like the ones manufactured by Acratech, are brilliant for this type of photography as they contain a clear degree scale to ensure accuracy and compatibility with Arca Swiss, Kirk and many other tripod plate systems.
To create a panoramic stitch, the thing you will need to do is take the photos. Once you have the camera or lens mounted on the Panoramic Head, turn your attention to the camera settings. All settings including, ISO, shutter speed, aperture, white balance and focus should be switched to manual focus to ensure consistency across all images.
Now all the settings are set, rotate the Panoramic Head to the starting spot and take the first photo. Then, move the Panoramic Head a certain number of degrees, making sure you have an overlap of around 10-15% (some extra overlap won't hurt) of the previous image. Continue this until you have captured all photos in the horizontal row.
A Nodal Rail is often used in panoramic photography to insure that you are rotating your camera around the “Nodal Point” which is the point where objects in the foreground do not appear to be moving in relationship to objects in the background when you pan. You can see more about it here in the Acratech PanaramicVideo (the video is about 10 years old, but the information is still worthwhile).
https://www.youtube.com/watch?v=YnabeRl3PhU&feature=youtu.be
Pro tip: The Panoramic Head mentioned can shoot multi-row images so not only can you capture images in a vertical row, you can achieve multiple rows to form many horizontal rows.
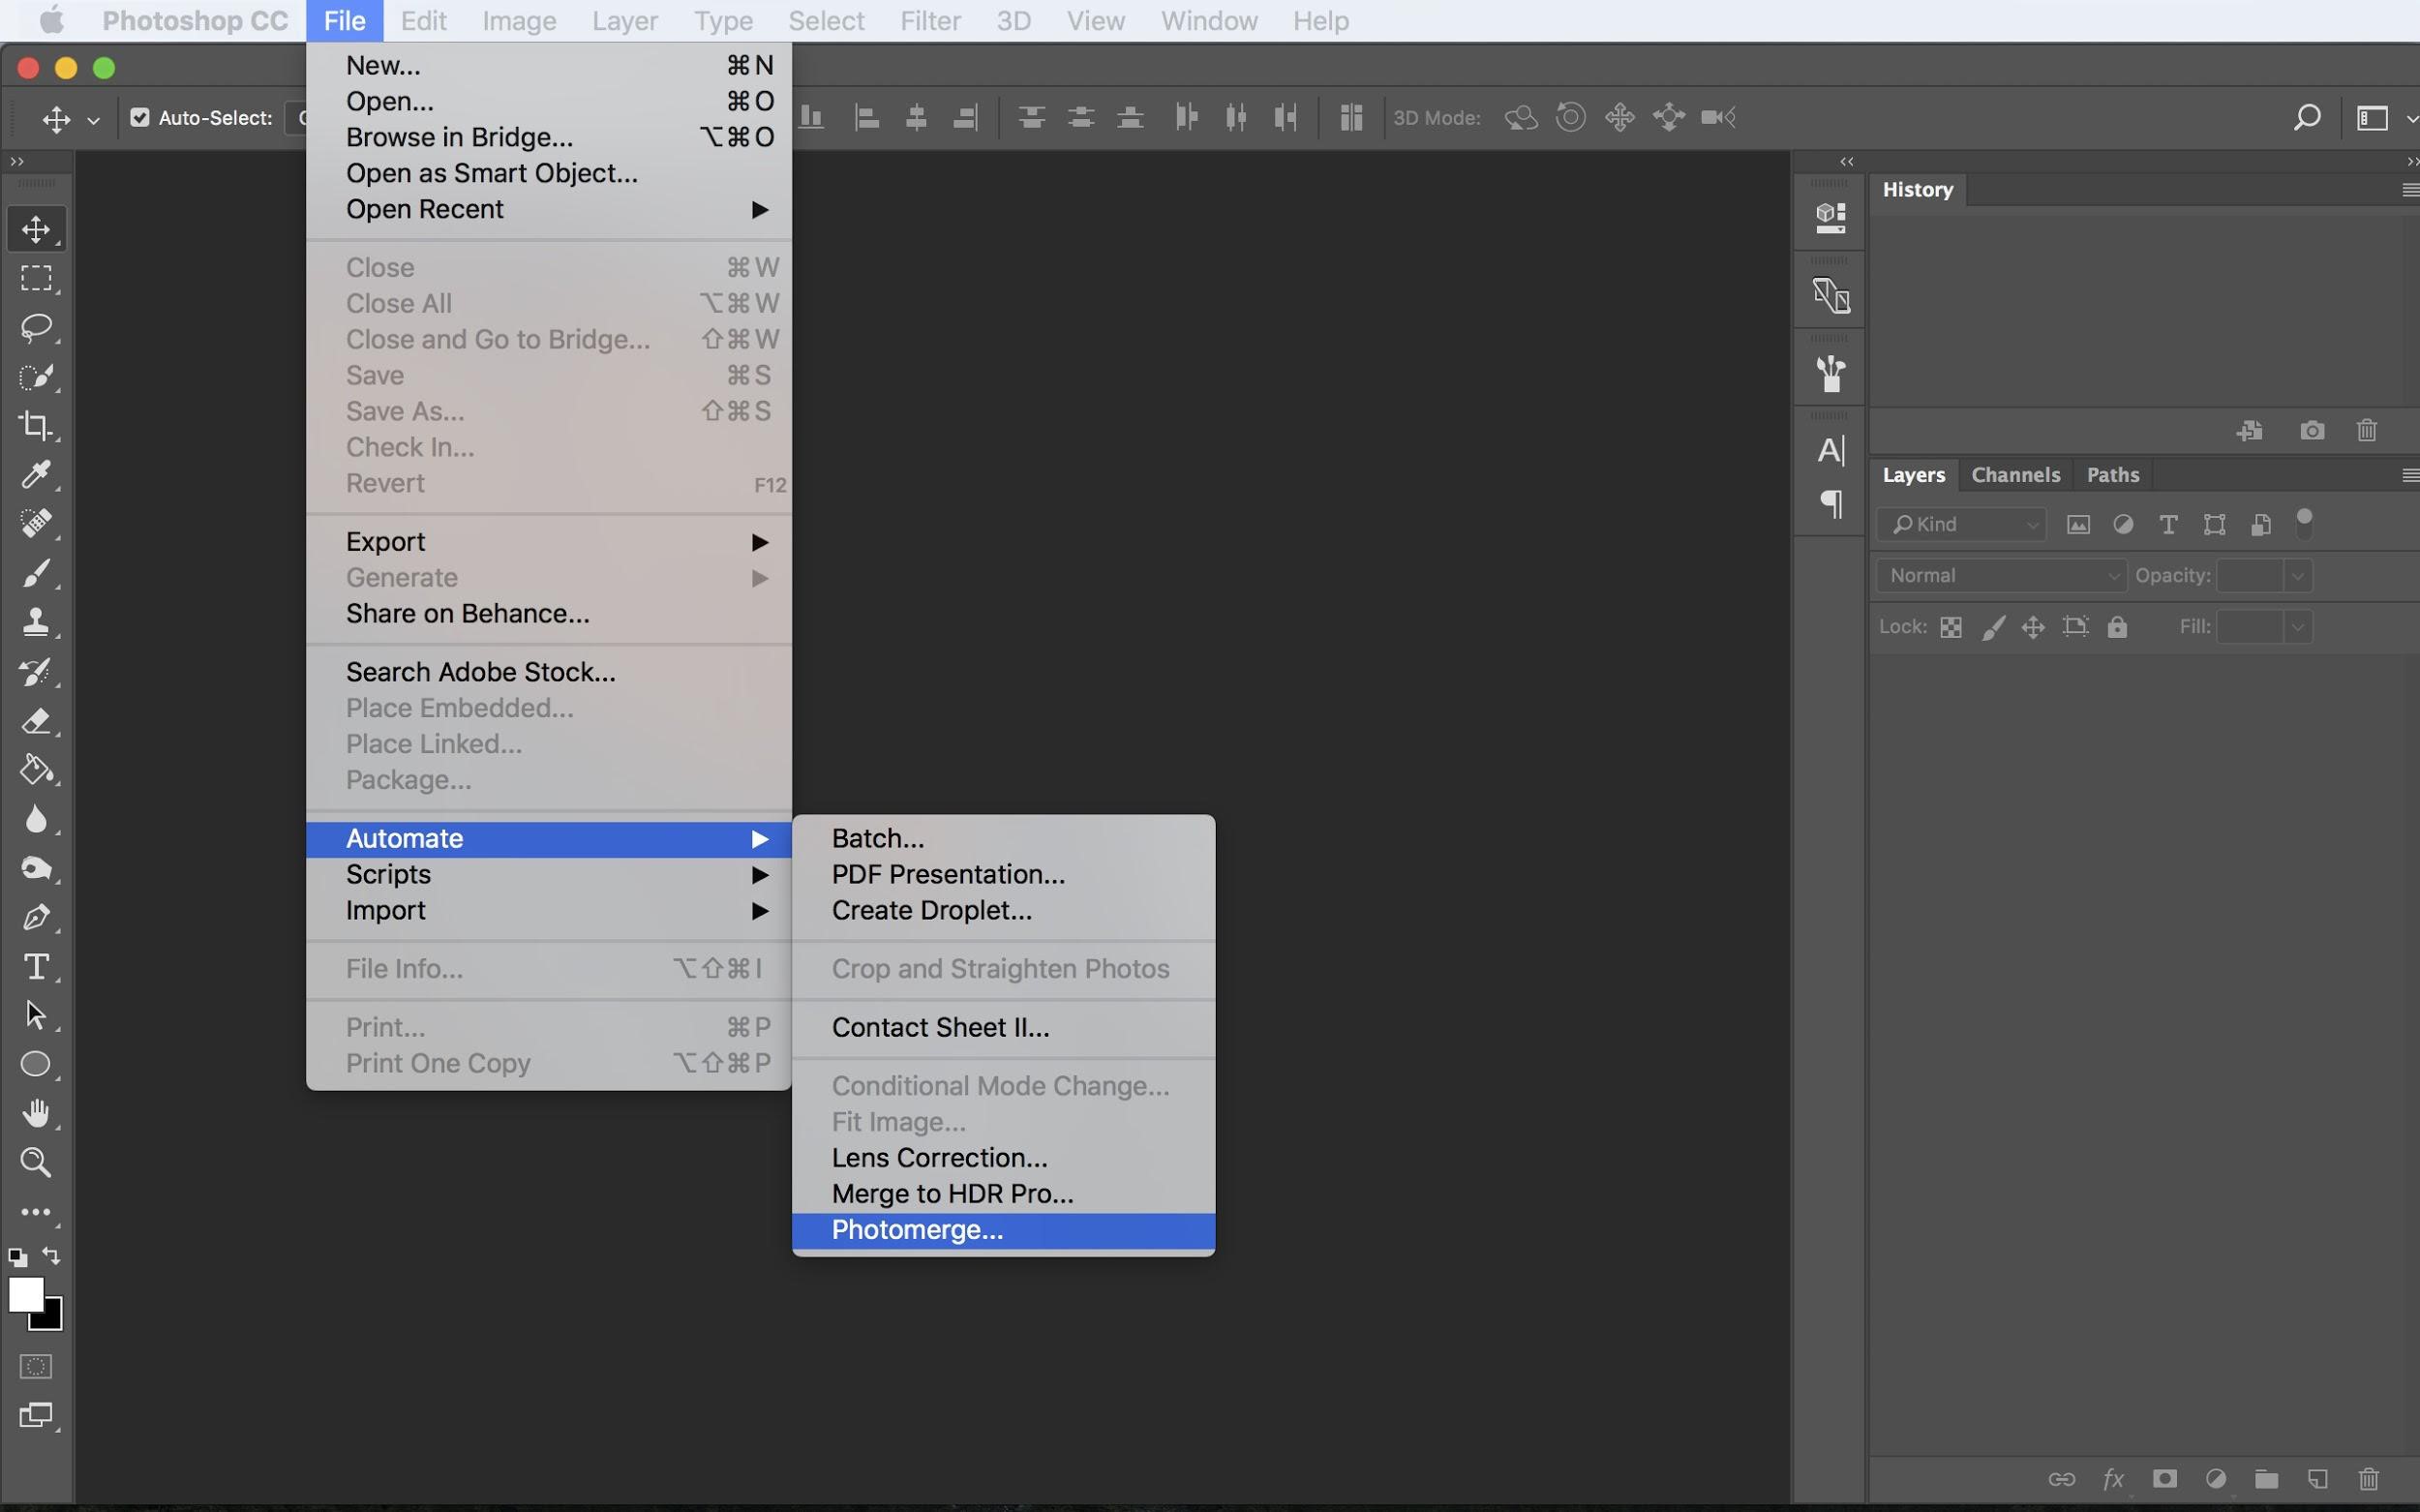
Now you have photographed the images, upload them to your computer. Open up Adobe Photoshop and navigate to the menu selection: File > Automate > Photomerge.
Once the Photomerge dialogue box opens, select the photos from your hard drive by pressing the ‘Browse…’ button.
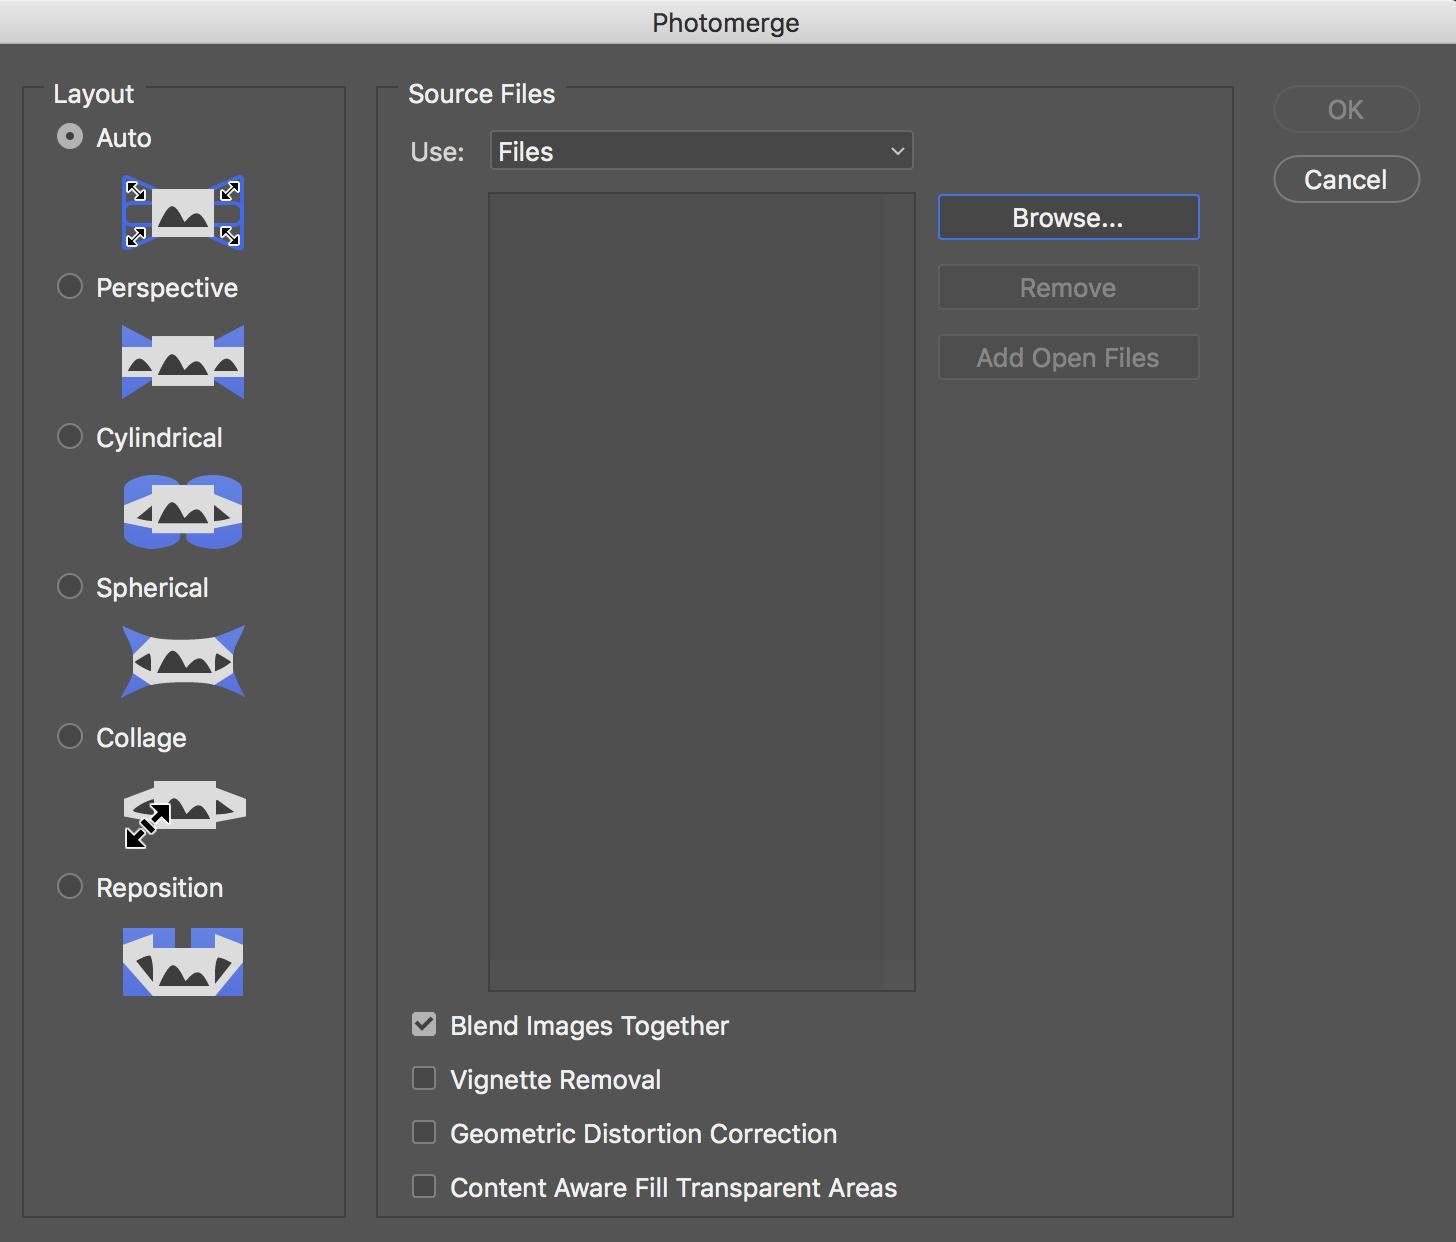
The default Layout settings should be fine for 99% of all panoramics created. Adobe Photoshop CC does a brilliant job at stitching images together, as long as when you photographed the photos you maintained around a 15% overlap on each following picture. All that is left to do now is press the ‘OK’ button, and the software will work it’s magic to create an amazing panoramic image.
It’s that simple. So the next time you plan on going to a scenic location, photography trip or workshop we encourage you to consider a Panoramic Head over a handheld setup. The ability to photograph multi-row images and even long exposures with precision accuracy makes the equipment a worthy investment, especially if you plan on doing any HDR photos that require uniformity and consistency.